In the Tromsø Science Center they have this model, a set of pendulums in which the second pendulum travels twice the speed of the first, the third three times, and so on. I posted a flash program of this pendulum trick earlier that allows to you experiment with the number of balls.
What is the shape of the frame that the pendulums attach to? How does length of the pendulum affect the time it takes to complete one swing, and how must the lengths change to have a linear progression of time change from one pendulum to the next?
30.5.12
25.5.12
Abel Prize 2012 in Tromsø
 |
| Mike Naylor and Endre Szemerédi |
I was invited to be the guest speaker in conjunction with this event. I presented a 30 minute math entertainment show for a crowd of excited 6th graders to open for the star of the day who talked with the children and later gave a public lecture of his own (at a somewhat higher level than mine!) It was quite an honor, and quite a lot of good fun as well! I met Endre and his wife and a host of officials including the mayor of Tromsø, the chancellor of education, and the president of the Norwegian Royal Science Academy. After lunch and the lectures, we visited the Polar Museum and then met for dinner and drinks later.
It was a very special day, in a very beautiful and enchanting city.
24.5.12
Magic square sculpture
This is a beautiful integration of math, art and encoded meaning. This sculpture stands on the NTNU campus in Trondheim Norway. There are 36 square rods coming from the ground, 4 groups of 9, one group in each corner. Each group of 9 is a 3x3 array, and within that array the rods are each a different length. The different lengths represent the numbers from 1-9, and the lengths are arranged to make a magic square at each corner. The rods are connected at the top so that like one length from each set is connected to another. The 5s (which are the center rods in each group of 9) are all connected together with a blue acrylic square.
I will need to revisit this structure and think about it further. What is the arrangement of each of the four magic squares? Are they different? Do they represent all of the unique solutions to 3x3 magic squares? How many unique solutions are there?
And how are the connections made? I thought originally that all the 1s were connected and all the 2s were connected and so on, but in my pictures it may be that 1 is connected to 9 to 1 to 9, and 2 to 8 to 2 to 8, and so on.
It is a piece of artwork that invites me to think about it, and keep thinking about it. That's what math art is all about!


22.5.12
Build a Fractal tetrahedron (instructions)
I've built several of these fractal tetrahedra before. It's a nice group project and can motivate discussion on geometric ideas. This project takes about 60 minutes with adults, and about 90 minutes with kids. This is appropriate for just about any ages. I get requests for instructions, so I've written them up below, along with some questions to ask during the process to bring out some mathematical ideas. Have fun with this very cool project!


Here's how to do it.
Instructions
Materials:
• 64 x 6 = 384 straws to make one the size shown above. Preferably not the flexible kind, these will work but can cause some problems with bending.
• String
• Tape and/or glue sticks
• Scissors
• 64 sheets of colored paper, printed with triangle template
1. Triangle template. The tetrahedron looks awesome if one face is covered with a piece of colored paper. An easy way to do this is to print out the following triangle pattern on colored paper. You will need to experiment a little to find the right size to fit your straws. I'd suggest making one copy and setting a triangle of straws on top and check to see if it fits well on/in the inner triangle. The idea is that the outside flaps will be folded over the straws and taped or glued to the paper on the inside.
 Use your copier's zoom feature to get the right size. It is entirely okay if your straws are a little too long for your paper and one of the corners of your triangle is cut off as shown here:
 My straws have always been a little too long to make a template that fits on a standard size sheet of copier paper. Just be sure not to cut off a flap so that it is too short to fold over.
Below is a picture you can use as a template. Clicking on it should make it a big size. I think. You can also just set a straw triangle on paper and draw the template by hand. It doesn't need to be a work of art.
 You'll need 64 copies in several different colors. You should make a few more because someone will mess up during construction.
2. Straws and String. Each tetrahedron requires 6 straws and we'll be making 64 tetrahedra all together. You'll need two different lengths of string: 64 long pieces that should be the length of 6 straws, and 64 short pieces that should be 10 cm (4 inches) longer than one straw.

3. Starting the activity. If you're leading the activity it's good to have one tetrahedron built ahead of time to show as a model. Have scissors and glue sticks or tape available and distribute straws, string and paper. I usually have a group of about 30 builders, so everyone gets to make more than one.
4. String 3 straws on the long string and tie together to make an equilateral triangle. The knot must be close to the end of the string so there is still a long tail of string left. If your string is too soft or fuzzy, it may be difficult to get through the straw. If this is the case, the end of the string can be put in the straw and you can suck the other end of the straw and suck the string right through. It works well and is pretty funny.
 Questions: What kind of triangles are we making? (equilateral) Why are they called equilateral/what makes these equilateral?
5. Put two more straws on the end of the string and tie the end to one of the corners of the triangle to make a rhombus.

Questions: What shape is this? (rhombus) How do you know it is a rhombus? (all sides the same length) What other properties does this shape have? (it is a parallelogram, it has 60° and 120° angles)
6. Tie the end of the short piece of string to the third corner of the triangle that is not already connected to the other triangle.
 7. Slide the sixth straw on this string.
 8. Tie the end of this string to the opposite corner of the rhombus. The structure folds to create a tetrahedron!

Questions: Describe this form: How many edges does it have? (6) How many faces? (4) How many vertices? (4) What is is called? (tetrahedron) What does tetra mean? (Greek for 4. There is a connection to the game Tetris: in Tetris all of the shapes are made from 4 squares)
9. Cut out the triangle template. Participants can write their names in the triangle so the name can be seen from the bottom. Set the tetrahedron on top of the paper shape.

10. Fold the flaps over. It may help to pre-crease the flaps. Use tape or glue to attach the flaps to the inside of the triangle.


Here's how to do it.
Instructions
Materials:
• 64 x 6 = 384 straws to make one the size shown above. Preferably not the flexible kind, these will work but can cause some problems with bending.
• String
• Tape and/or glue sticks
• Scissors
• 64 sheets of colored paper, printed with triangle template
1. Triangle template. The tetrahedron looks awesome if one face is covered with a piece of colored paper. An easy way to do this is to print out the following triangle pattern on colored paper. You will need to experiment a little to find the right size to fit your straws. I'd suggest making one copy and setting a triangle of straws on top and check to see if it fits well on/in the inner triangle. The idea is that the outside flaps will be folded over the straws and taped or glued to the paper on the inside.

Below is a picture you can use as a template. Clicking on it should make it a big size. I think. You can also just set a straw triangle on paper and draw the template by hand. It doesn't need to be a work of art.

2. Straws and String. Each tetrahedron requires 6 straws and we'll be making 64 tetrahedra all together. You'll need two different lengths of string: 64 long pieces that should be the length of 6 straws, and 64 short pieces that should be 10 cm (4 inches) longer than one straw.

I cut these myself ahead of time by wrapping string around the backs of two chairs that I've spaced so that one wrapping of string is the right length. I simply wrap 64 times and then with one big cut of the scissors all of the strings are the right length. Easy! I wrap around a book to make the short lengths. If you're short on prep time, you can just supply string and have your builders cut their own lengths.
3. Starting the activity. If you're leading the activity it's good to have one tetrahedron built ahead of time to show as a model. Have scissors and glue sticks or tape available and distribute straws, string and paper. I usually have a group of about 30 builders, so everyone gets to make more than one.
4. String 3 straws on the long string and tie together to make an equilateral triangle. The knot must be close to the end of the string so there is still a long tail of string left. If your string is too soft or fuzzy, it may be difficult to get through the straw. If this is the case, the end of the string can be put in the straw and you can suck the other end of the straw and suck the string right through. It works well and is pretty funny.

5. Put two more straws on the end of the string and tie the end to one of the corners of the triangle to make a rhombus.

Questions: What shape is this? (rhombus) How do you know it is a rhombus? (all sides the same length) What other properties does this shape have? (it is a parallelogram, it has 60° and 120° angles)
6. Tie the end of the short piece of string to the third corner of the triangle that is not already connected to the other triangle.


Questions: Describe this form: How many edges does it have? (6) How many faces? (4) How many vertices? (4) What is is called? (tetrahedron) What does tetra mean? (Greek for 4. There is a connection to the game Tetris: in Tetris all of the shapes are made from 4 squares)
9. Cut out the triangle template. Participants can write their names in the triangle so the name can be seen from the bottom. Set the tetrahedron on top of the paper shape.

10. Fold the flaps over. It may help to pre-crease the flaps. Use tape or glue to attach the flaps to the inside of the triangle.

11. Make groups of 4. Set three tetrahedra together corner to corner as shown and tie the vertices together. There will be loose ends of string that will be useful for this. If not, cut small lengths of string to use.

12. Set the fourth tetraheron on top and tie the corners to the tops of the lower tetrahedra to make a large tetrahedron.

Describe the shape made on the inside of the tetrahedron – how many
edges and vertices and faces and what shapes are the faces? (it has 8
triangular faces, 12 edges, 6 vertices. It is called an octahedron, another one
of the Platonic solids).
13. Four groups should now come together and connect their four large tetrahedra together in the same way to make an even bigger tetrahedron.
14. There will now be exactly 4 of these even bigger tetrahedron in the room. Connect these 4 together to make the giant full-size tetrahedron.
15. Find a place to hang it!
Questions: How many tetrahedra are there? How many straws? What are different ways to count these? If we made the next larger tetrahedron how many straws would we need? If one small tetrahedron is stage 0 and the next step combines 4 of these to make a stage 1 tetrahedron, and the next composite form is stage 2, can we write a formula to describe the number of small tetrahedron or number of straws in stage n?

16. Extend?
At the end of any math-art activity, we should "LOOK AGAIN." Take time to look at the shape for hidden forms, ideas and connections. What could be changed next time to make the shape more interesting?
• What other materials could be used? With lightweight skewers and tissue paper, maybe this fractal could be a kite and fly!
• What kind of color schemes could be used? A random arrangement of colors always seems to come out nicely, but what kinds of color patterns could be used?
• Research: Sierpinski triangle. Platonic solids.
If you've done this activity and have any good questions to ask or ideas, please post them in the comments! Enjoy!
18.5.12
"World's largest" snowflake
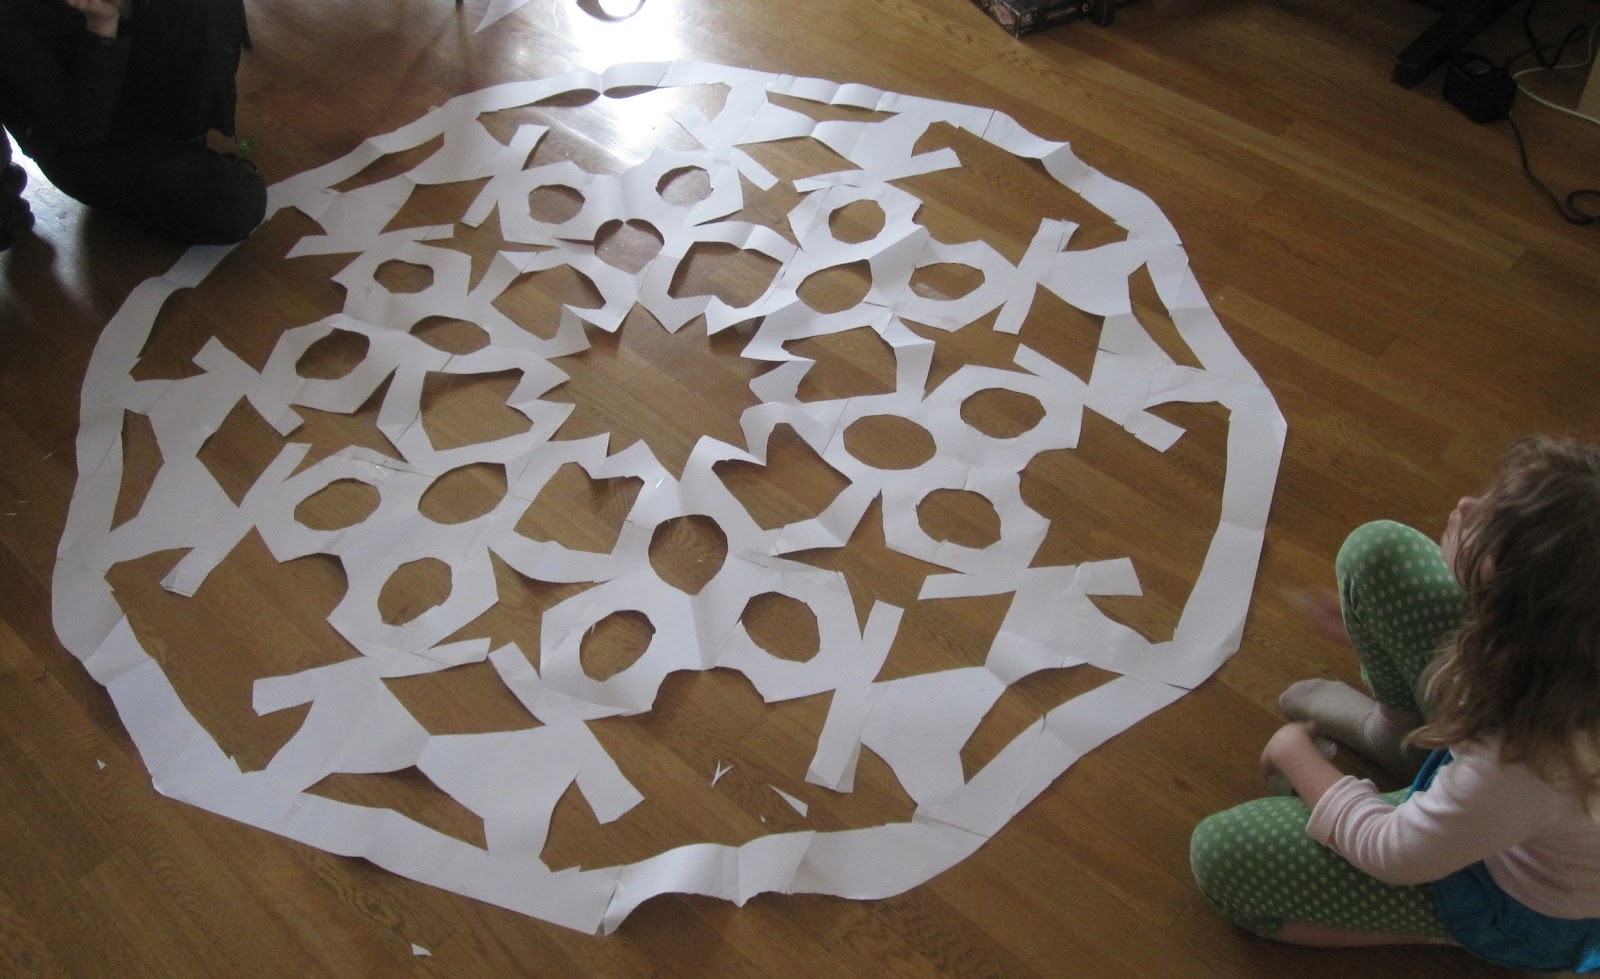
I came home one day to have my daughter (7 years-old at the time) ask me if she could tape together a whole bunch of sheets of paper to make a really big piece of paper.
"Why on earth?" I asked.
"So I can make the world's biggest snowflake!" she said gleefully.
The first thought through my mind was that that would be a tremendous waste of paper. The second thought through my mind was that that would be a perfectly wonderful use of paper. "Only if I can help too!" I told her.
We meticulously taped together a big rectangle in a squarish shape. "Should we add one more row or one more column to make it most square-like?" I asked.
"We could measure it," she offered. We took a tape measure and found it was very close to a square already. My oldest daughter came to watch and we had a discussion about A4 paper and if we were close to size A0 (our paper was bigger than A0). "Is there a size A-negative-one?" she asked.
Next we folded our giant almost-square it in half, then we folded that into thirds in a wedge shape. We needed as close to a 60° angle as possible, so we had to measure the angle as well. Then she halved the wedges again and drew a design that she allowed me to cut out.
Opening the snowflake took time. We hadn't taped the complete edges, just a couple of spots on each edge, so pieces of the cut snowflake separated as we opened it. With each unfolding we had to use extra tape to reconnect edges.
Finally we opened it all the way. The "world's largest" snowflake!

Unfortunately, we didn't have the world's largest window, so it lived on the floor of our living room for a week. The kids danced on it, stepping only in the openings, and played other games. Finally it was time for our snowflake to head to recycling.
It was a beautiful math project, conceived of and driven by a talented and determined 7 year-old girl.
"Why on earth?" I asked.
"So I can make the world's biggest snowflake!" she said gleefully.
The first thought through my mind was that that would be a tremendous waste of paper. The second thought through my mind was that that would be a perfectly wonderful use of paper. "Only if I can help too!" I told her.
We meticulously taped together a big rectangle in a squarish shape. "Should we add one more row or one more column to make it most square-like?" I asked.
"We could measure it," she offered. We took a tape measure and found it was very close to a square already. My oldest daughter came to watch and we had a discussion about A4 paper and if we were close to size A0 (our paper was bigger than A0). "Is there a size A-negative-one?" she asked.
Next we folded our giant almost-square it in half, then we folded that into thirds in a wedge shape. We needed as close to a 60° angle as possible, so we had to measure the angle as well. Then she halved the wedges again and drew a design that she allowed me to cut out.
Opening the snowflake took time. We hadn't taped the complete edges, just a couple of spots on each edge, so pieces of the cut snowflake separated as we opened it. With each unfolding we had to use extra tape to reconnect edges.
Finally we opened it all the way. The "world's largest" snowflake!
Unfortunately, we didn't have the world's largest window, so it lived on the floor of our living room for a week. The kids danced on it, stepping only in the openings, and played other games. Finally it was time for our snowflake to head to recycling.
It was a beautiful math project, conceived of and driven by a talented and determined 7 year-old girl.
15.5.12
Olso Opera House
The opera house in Olso was opened in 2008. It's a fantastic building, designed to represent an iceberg. Visitors may walk up the outside and on top.
There's some very lovely artwork in, around and on the opera house. My two favorites are the walls on the first level and the cladding on the roof.
Olafur Eliasson designed these walls inside the opera house with rows of rhombusese that collapse as they flow down to the floor. The walls are backlit and intended to give the impression of melting ice. If the vertical axes of the rhombuses changes by the same factor in each row, what is the shape of the curves forming their boundaries?


On the roof there are large metal panels of cladding with designs made by circular bumps both pressing in and out (see the picture of the cover of 'tekstilkunst' below). I examined these patterns at length, pondering the design. Each position on the cladding could be out, in, or flat. +1, -1, and 0. Base 3 numbers are possible. Is there a message? I thought perhaps it could represent music. If I were using these elements in a design for an opera house, I would encode a Greig opera.
I couldn't discover a message so I tracked down the artists, Astrid Løvaas and Kirsten Wagle, and asked them. They told me the designs was based on tradition Norwegian basket weaving, and sent me a copy of a journal article which described the design and construction method. Mystery solved!

I was a little disappointed that the design did not have a musical basis, but neither was it random. It was based on a traditional design, and since the opera house is a Norwegian cultural center, it is still appropriate.
It is also a example of what I like to see in mathematical artwork: a design that has a meaning, a design that represents or encodes something, a design that both invites deeper reflection and rewards the person who is seeking meaning.
12.5.12
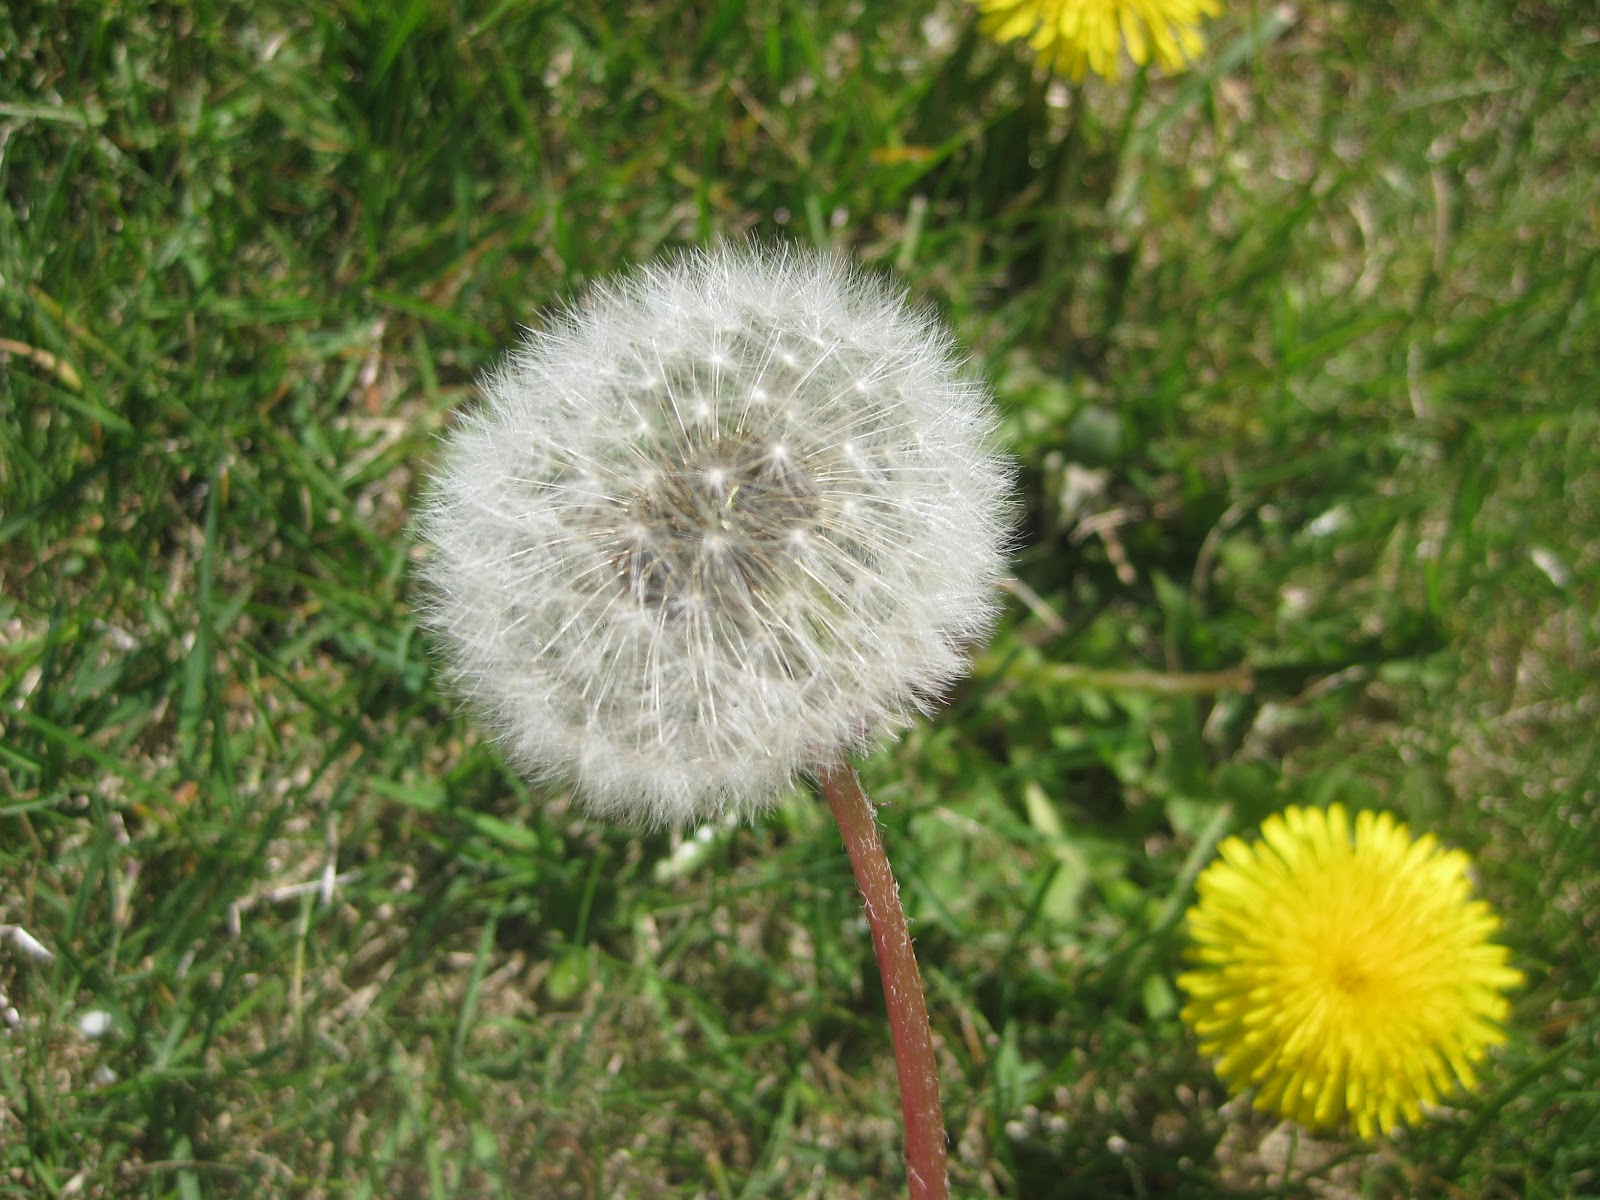
Dandelion spiral
Golden flowers, a special arrangement of seeds in spirals based on the golden ratio, are common in the plant world. I was looking at dandelion and suspected there was one underneath the white fluffy seed parachutes. I blew on it a few times to find out and sure enough, there's a golden spiral under those seeds. Nice!
Here's a pdf file of a paper I wrote some years ago on the mathematics of these spirals: http://www.mike-naylor.com/naylor-seeds.pdf. And here's a nice video by Vi Hart: http://youtu.be/ahXIMUkSXX0
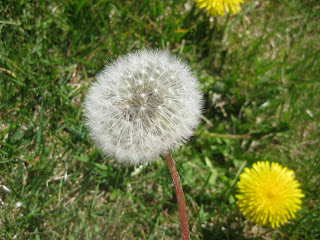

Here I've drawn in two sets of spirals, 8 and 13. The set of spiral with 21 arms is fairly easy to see also.


9.5.12
Fountain at NTNU
This surprising fountain on the NTNU campus in Trondheim has three half-solids which reflect in the water to make a cube, sphere, and octahedron. Simple and lovely.


The "sphere" is actually a half-sphere, sitting on top of a cylinder. The cylinder has height equal to the radius of the sphere.
The "octahedron" is the top half of a pyramid... if you look closely you can see the rest of the pyramid under the water. The cube is actually a cube, the water level cutting it in half and reflecting it onto itself.
There's plenty of good math ideas here:
How does the volume of the half-sphere compare to the volume of the cylinder it sits on?
Which is greater, the ratio of (volume half-sphere):(volume cylinder) or (volume cylinder):(volume whole-sphere)?
What is the ratio (volume octahedron):(volume big pyramid)?
4.5.12
Newspaper geodesic dome
This was a good snow-day activity: making a geodesic dome from tubes rolled from newspaper. Here's a few pics from various stages. The kids loved it, and I've done it for several family math events since. You can get directions from Jill Britton's website here. You'll need to scale the size of the tubes to match with the size newspaper in your country. I'd recommend rolling two sheets of paper together with each tube for strength.


2.5.12
Impossible sculpture
In the lobby of a museum of 3d art and optical illusions in Germany is this beautiful "impossible figure" sculpture. Three right angles in three directions, somehow joining into a triangle.

Walking to side reveals that there are indeed three right angles in three directions, but they're not physically joined. Only in your eye and brain!


Walking to side reveals that there are indeed three right angles in three directions, but they're not physically joined. Only in your eye and brain!
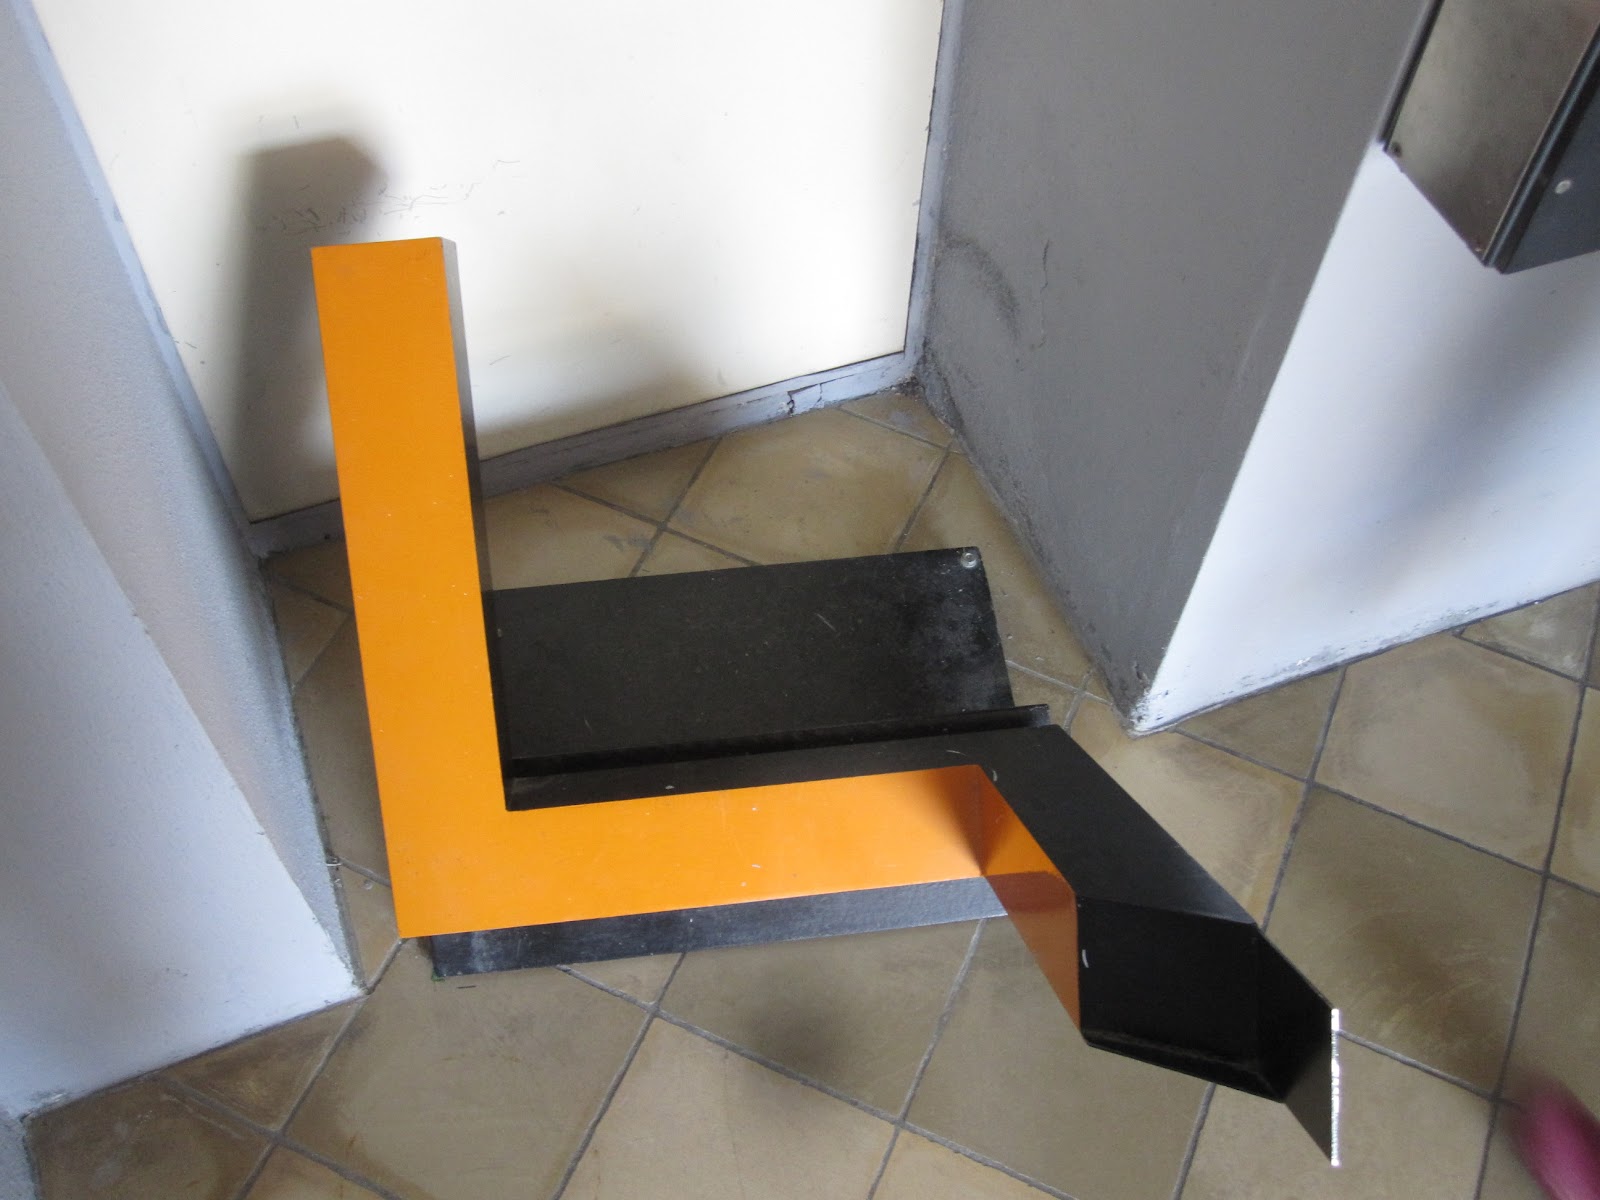
This was a fun museum. I'll post more on it later.
Subscribe to:
Posts (Atom)